NEW DELHI: Here’s a situation almost everyone meets. You walk into a bank to open an account, or your new employer sends you a form, and there’s one box you can’t fill: PAN number. If you don’t have a PAN card yet, relax. You can apply from your phone, and in some cases you’ll have it within minutes.
There are three official ways to do it. The quickest is the free instant e-PAN on the Income Tax portal, which uses your Aadhaar. The other two are Protean (the portal that used to be called NSDL) and UTIITSL. Let’s see how each one works.
Two things to check first
Do you already have a PAN? If yes, don’t apply again. Just use “Download e-PAN” or “Know Your PAN.” And watch the website address. It should show incometax.gov.in. If a link on WhatsApp promises a PAN card, ignore it.
Which route should you pick?
- Instant e-PAN: Free, and you get a digital PAN. It’s for Indian individuals who have a valid Aadhaar. NRIs, firms, HUFs, companies and trusts can’t use this one.
- Protean or UTIITSL: Choose these if you want a physical card, or if the instant route isn’t open to you.
Route 1: Instant e-PAN (free)
Step 1: Keep your Aadhaar with you. Your mobile number should be linked to it. If not, get it updated at an Aadhaar centre first.
Step 2: Open the Income Tax e-filing portal and click “Instant e-PAN.”
Step 3: Type in your Aadhaar number. An OTP will reach your phone. Enter it.
Step 4: Read through the details that show up on screen. If they look right, submit.
Step 5: Download your e-PAN as a PDF. Under the latest rules, you may also be asked for a proof of birth document through DigiLocker. So keep that account ready.
Route 2: Protean or UTIITSL
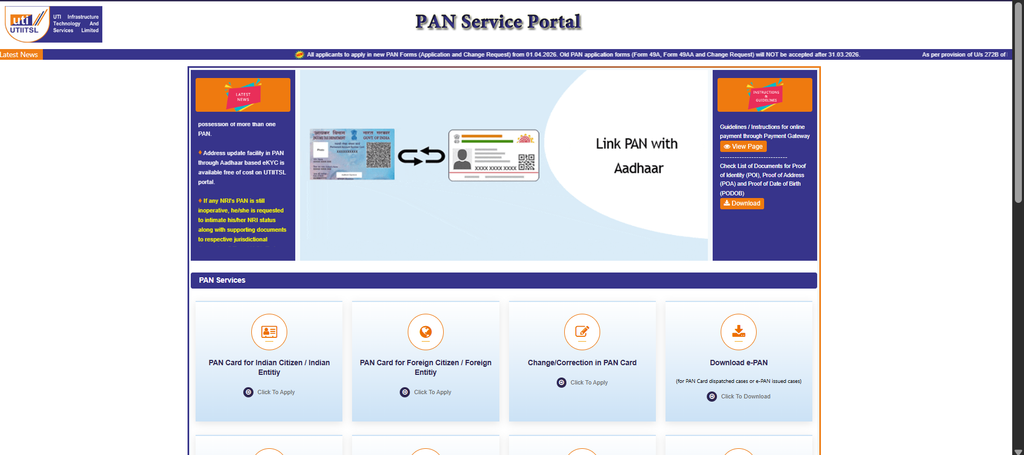
One thing has changed. Since 1 April 2026, Indian individuals use Form 93 for new PAN applications. It replaces the old Form 49A. Also, Aadhaar alone no longer counts as proof of birth. Here’s the process:
Step 1: Go to the Protean or UTIITSL website and choose “Apply for New PAN.”
Step 2: Select “Individual” as your category. Then fill in your personal and contact details.
Step 3: Pick how you want to submit your documents. You can go paperless with Aadhaar e-KYC, upload scans with e-Sign, or send physical papers.
Step 4: Choose what you want: a physical card, an e-PAN, or both.
Step 5: Pay online. As of July 2026, the fee was ₹107 for a physical card delivered in India, and ₹72 for an e-PAN only. These amounts can change, so check the portal before paying.
Step 6: Save your acknowledgement number. Without it, tracking gets harder.
Which documents should you keep ready?
- Proof of identity
- Proof of address
- Proof of date of birth, like a birth certificate or school certificate
- A passport-size photo and signature, if you apply by upload
What about a child’s PAN?
A child can’t apply alone. A parent or guardian fills in the form and submits their own documents as proof.
How to track your application
- Instant e-PAN: Open the e-filing portal, go to Instant e-PAN, click Check Status and enter your Aadhaar number.
- UTIITSL: Use “Track PAN Card” with your coupon number or date of birth.
- Protean: Enter your acknowledgement number on the tracking page.
Mistakes to avoid
- Writing your name differently from the way it appears on your documents
- Falling for a fake website that charges extra
- Using a mobile number that isn’t linked to Aadhaar
- Applying again when you already have a PAN
The short version
- Check that you don’t already have a PAN
- Pick a route: instant e-PAN, Protean or UTIITSL
- Verify with your Aadhaar OTP and fill in your details
- Pay the fee if you want a physical card
- Save your acknowledgement number
- Track your application and download or receive your PAN
That’s all there is to it. Spend a few minutes getting your details right, and the rest takes care of itself.